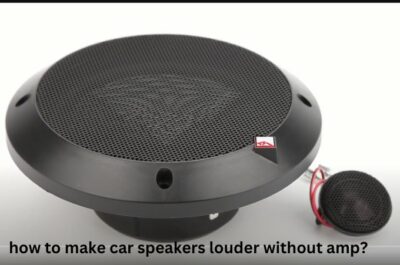
How to Change Your Car Speaker
I am bored with the sound of this speaker.
This speaker has no bass at all.
This speaker gets temperate within a short time.
I want a clear and live sound.
I assume these lines are rounding up in your mind, and you want to be relaxed by changing your speaker, am I wrong? If not, then don’t worry I am here to How to Change Your Car Speaker; I mean I will edify how you can do it.
How to Change Your Car Speaker
Pick Your Car Speaker From The Bestseller List Below-
No products found.
Let’s start!
Things You Need to Know Before Start Changing Car Speaker:
You have felt that you have to change your car speaker to get a better musical experience. That’s fine but you need better preparation to make this successfully happen. Here are a few actions you have to do before you start changing your speaker.
1. Find the Best fitted Speaker for Your Car:
Remember that you are changing your speaker to get a better musical experience, so you need to be more careful about speaker selection. Find the best pair of speakers within your budget limit that fit with your car model.
2. Choose a Safe Place for Changing:
Do you want to stop your changing process midway? I think absolutely not. So find a place where you can safely store removed parts and screws. Choosing a safe place is the initial requirement for quick and trouble-free changes.
3. Arrange Some Necessary Tools:
You have to arrange some quantity tools for changing your speaker. Tools arrangement varies from car model to model. It is better to check the mechanical structure of your car before arranging tools.
My proposition is in this regard, to buy a tools package that contains almost every necessary tool and that goes with almost every screw and part.
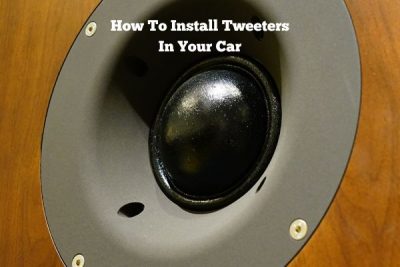
Also Read: How to install car Speakers
Here is a List of Tools We Use More Often
No products found.
- A series of screwdrivers. (such as Phillips, stubby Phillips, flat-blade, and magnetic or offset screwdrivers)
- Torx drivers and bits.
- Nut drivers.
- Drill. (with screwdriver and bits)
- Soldering iron and solder.
- Right angle.
- Crimping tool and connectors.
- Panel removal tool/ panel poopers.
- Allen wrenches.
- Socket wrench set.
- Wire cutter/stripper tool.
- Retaining clip remover. (or a screwdriver covered with a shop rag)
- A file.
- Electrical tape.
- Hobby knife.
Common Recommendations for Your Changing Process:
- Remove your screws and parts using the right driver.
- Disconnect the connectors from the parts.
- Make sure you are keeping all the parts and screws in a safe place.
- Keep your screws and parts in separate boxes.
- Don’t put pressure to adjust screws and parts, adjust them gently.

How You Can Change Your Car Speaker:
Here I will show you how you can change your car speaker of the door panel and rear panel for two different models. You might find some dissimilarities in your car with my guide.
However, the initial process of changing the speaker is almost the same for each model of the car. So let’s start changing…..
Changing Door Panel Speaker:
Here I will show you how you will change the door speaker of your car. I will show you the change for Ford F250.
First Step: Sail Panel Removing
The door panel speaker change starts with removing of sail panel. At the upper-left side of your right door, you will see the sail panel. Pick the trim panel from your toolbox and remove the sail panel using it. Keep this sail panel in a safe place.
One thing I can assure you is that when you start removing the sail panel, you may think it is about to break down but don’t worry, it sounds like that.
Second Step: Power Window Removing
Have you finished the removal process? If yes, then move forward to removing the power window or power door lock. Release the clips congested to the power panel, then you will able to remove the whole panel by lifting it uphill.
Most of the time power window has some connectors so disconnect those before keeping it in a safe place.
Third Step: Removing the 7-Millimeter Screw:
The 7-millimeter screw is a unique size and crucial screw of this door panel, so be careful to remove and place it in a safe zone. Choose a screwdriver that matches best with this screw and remove it smoothly.
Fourth Step: Removing the Reflector Lens:
You will see a reflector lens at the middle-right point of your right-side door. Using any screwdriver, you can remove it. After removing you will see a screw, choose a drive that fits with the screw, then remove it from the panel.
Fifth Step: Door Panel Removing:
Most of the cases the door panel is attached to the door with retaining clips around the edge, but this Ford F250 has no retaining clips so simply lift the panel and remove it from the door. Before removing make sure there are no connectors connected to it.
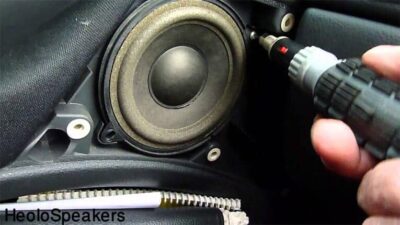
Sixth Step: Old Speakers Removing:
It’s time to say goodbye to your old speaker. Choose the right piece of the driver for removing the speaker’s screws then remove the screws gently. After removing the screws, disconnect the harness connected to the speaker.
Seventh Step: Install Your New Speaker:
Finally, you are there! I think you have collected your new speaker along with the harness. Here each harness connects with both the speaker and the car. Connect the female slide of the harness with the speaker and another slide with the car stereo.
After connecting with both sides place the speaker in the hole. Make sure that the speaker properly matches the hole. If not, you can use a bracket for it. Now, attach the screw of the speaker using the right driver.
Step Eight: Repeating:
After installing the new speaker in the door panel repeat the steps inversely. I think you will get your car fitted with your new speaker.
Also Read: How To Measure Car Speakers Size Yourself
No products found.
Changing Rear Panel Speaker:
If you want to change your rear speaker, this part will fit your need. Here I will instruct you on how you can change your rear speaker of Camry 2012- 2014.
Folding the Backseat:
In this model, you don’t need to remove the backseat to change your rear speaker. If you concentrate on the downside of your back seat, you will see a lever simply pulling this lever you can fold your back seat.
Removing Side C Pillars:
After folding the backseat, you have to move for removing the side ‘c’ pillars. There are two ‘c’ pillars in this model one on the left side and another on the right side. Using a simple flat screwdriver, you can remove both pillars. After removing keep them in a safe place.
Removing Brake Light:
At the back surface, you will notice a brake light. Putting some pressure you can lift the brake light from the surface. Don’t forget to remove the Molex plug of the light too.
Removing the Back Panel:
Pull up and unsnap the panel pressure clips to hang up the panel from the car’s body. You can use a screwdriver if you need one. Here you don’t need to separate the back panel from the car’s body. Just by hanging it up, you can install your speaker.
Removing Speaker:
In this Camry 2012- 2014 you will find 4 10-millimeter bolts that attached the speaker to the car. Remove those screws using the right driver. Then unplug the connectors from the speaker. Finally, keep both screws and speakers in a reserved place.
Install New Speaker:
Using the harness, you can connect your new speaker to the car stereo system. After connecting the connectors, attach the speaker to the rear panel. You can use a rubber bracket if the speaker doesn’t fit perfectly.
Repeat the Process:
The change is over. Now, follow the steps inversely to set up all the removed parts.
Final Thought
I think you will be satisfied with your new speakers. If not, you may have to change it again and again. It won’t be hard as you know how to do it. However, follow every step vigilantly to avoid any unexpected incident.
Let us know if your mission of changing car speakers has been accomplished.