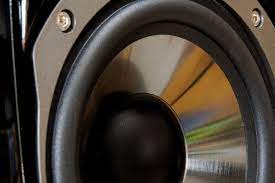
How To Find Speaker Wires In Car?
Are you tired of dealing with tangled and hidden speaker wires in your car? Do you dream of a crisp and clear sound system without the hassle of searching for the elusive wires? Look no further! In this guide, we will unveil the secrets to finding speaker wires in your car with ease, allowing you to enjoy your favorite tunes without any distractions or frustrations.
Whether you’re an audiophile or simply someone who appreciates good music on the go, understanding the ins and outs of your car’s speaker system is essential. However, locating the speaker wires can be a daunting task, especially with the complex wiring configurations found in modern vehicles. But fear not! We have compiled a comprehensive set of tips and techniques that will simplify this process, saving you time and effort. Get ready to take your car audio experience to a whole new level as we unravel the mystery of finding speaker wires in your car!
How to Find Speaker Wires in a Car:
- Remove the car’s stereo unit using appropriate tools.
- Locate the speaker wires connected to the stereo unit.
- Identify the color coding of the wires, such as positive (+) and negative (-).
- Trace the wires from the stereo unit to the corresponding speakers.

How to Find Speaker Wires in a Car
Are you looking to upgrade or repair your car’s audio system? One important step is to locate the speaker wires. In this guide, we will walk you through the process of finding the speaker wires in your car, ensuring a successful audio installation or repair.
Step 1: Gather the necessary tools
Before you begin, make sure you have the right tools on hand. You will need a multimeter, wire cutters, electrical tape, and a flashlight. These tools will help you identify and work with the speaker wires effectively.
Once you have gathered the necessary tools, move on to the next step.
Step 2: Locate the speaker wiring harness
The speaker wiring harness is usually located near the stereo head unit or the amplifier. In most cars, it is found behind the dashboard or under the seats. Use your flashlight to help you see and navigate through the car’s interior.
Start by removing any panels or trim pieces that may be covering the wiring harness. Be careful not to damage any surrounding components. Once you have access to the wiring harness, move on to the next step.
Step 3: Test the wires with a multimeter
Using a multimeter, set it to the resistance (ohms) mode. Touch the positive (red) probe of the multimeter to one wire in the harness and the negative (black) probe to a known ground point, such as the car’s metal frame. The multimeter will display a reading if the wire is connected to a speaker.
Repeat this process for each wire in the harness until you have identified all the speaker wires. Take note of the wire colors and their corresponding locations for future reference.
Step 4: Label and secure the speaker wires
Once you have identified the speaker wires, it is essential to label them properly to avoid confusion during the installation or repair process. Use colored electrical tape to mark each wire according to its corresponding speaker location.
Additionally, ensure that the speaker wires are properly secured and insulated to prevent any short circuits or damage. Use wire ties or electrical tape to bundle and secure the wires neatly.
Step 5: Test the speaker wires
Before proceeding with any audio system installation or repair, it is crucial to test the speaker wires to ensure they are functioning correctly. Reconnect the stereo head unit or amplifier and turn on the car’s audio system.
Play some music or a test tone and listen carefully to each speaker. If all the speakers are producing sound, then you have successfully located and connected the speaker wires in your car.
Step 6: Finalize the installation or repair
Now that you have found and tested the speaker wires, you can proceed with the installation or repair of your car’s audio system. Follow the manufacturer’s instructions or consult a professional if needed.
Remember to double-check all connections and secure any loose wires or components. Once everything is in place, enjoy your enhanced car audio experience!
Frequently Asked Questions
Here are some commonly asked questions about how to find speaker wires in a car.
Question 1: How can I locate the speaker wires in my car?
Locating the speaker wires in your car can be done by following these steps:
1. First, remove the panels or trim pieces that cover the speakers in your car. These are usually located on the doors or in the dashboard.
2. Once the panels are removed, you should be able to see the speaker wires. They are typically colored and may be bundled together.
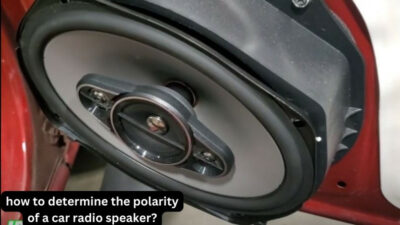
Question 2: What do the different colors of speaker wires indicate?
The colors of speaker wires can vary, but there are some common standards:
1. Red or black wires usually indicate the positive (+) and negative (-) terminals of a speaker.
2. Other colors like green, white, or blue might indicate additional speakers or channels.
Question 3: How can I test if a wire is a speaker wire?
You can test if a wire is a speaker wire by using a multimeter or a speaker wire tester. Here’s how:
1. Set your multimeter or tester to the continuity or resistance setting.
2. Touch one probe of the multimeter or tester to one end of the wire and the other probe to the other end.
3. If the multimeter beeps or shows a low resistance, it indicates that the wire is a speaker wire.
Question 4: Can I use a wire tracer to find speaker wires in my car?
Yes, a wire tracer can be a useful tool to find speaker wires in your car. Here’s how you can use it:
1. Connect the transmitter of the wire tracer to one end of the suspected speaker wire.
2. Use the receiver of the wire tracer to scan the area where the speaker wires might be located.
3. The receiver will emit a beeping or buzzing sound when it detects the signal from the transmitter, helping you locate the speaker wires.
Question 5: Are there any precautions I should take when working with speaker wires in my car?
When working with speaker wires in your car, it’s important to keep the following precautions in mind:
1. Disconnect the car battery before working on any electrical components to prevent any accidental short circuits.
2. Handle the wires carefully to avoid damaging them or causing any electrical hazards.
3. If you’re unsure about any electrical work, it’s always best to consult a professional car audio installer.

Source: pexels.com
In conclusion, finding speaker wires in your car can seem like a daunting task, but with the right tools and a little patience, you can successfully locate and connect them to upgrade your audio system. Remember to start by gathering the necessary supplies, such as a multimeter and wire strippers, to ensure a smooth and efficient process. Take the time to plan your route and follow the manufacturer’s instructions, as each car may have a slightly different wiring setup. Additionally, don’t hesitate to seek assistance from professionals or online forums if you encounter any difficulties along the way.
By taking the time to properly locate and connect your speaker wires, you can greatly enhance your car audio experience. Whether you’re a music lover or simply enjoy the crisp sound quality, this process will undoubtedly improve your driving experience. So, don’t hesitate to embark on this DIY project and enjoy the satisfaction of a job well done, as you cruise down the road with your favorite tunes playing through your newly upgraded speakers. Happy wiring!