How To Wire A Center Channel Speaker Car
Today we discuss How To Wire A Center Channel Speaker Car. Are you a car enthusiast who is passionate about enhancing your audio experience on the road? If so, then knowing how to properly wire a center channel speaker in your car is an essential skill to have. Whether you’re a seasoned DIYer or a beginner looking to upgrade your car’s audio system, this guide will provide you with the necessary steps and knowledge to achieve optimal sound quality.
A center channel speaker plays a crucial role in any car audio setup, as it is responsible for reproducing dialogue and other important audio elements in movies, music, and podcasts. By wiring it correctly, you can ensure that your center channel speaker delivers clear and balanced sound, enhancing your overall listening pleasure. In this comprehensive guide, we will walk you through the process of wiring a center channel speaker in your car, covering everything from choosing the right speaker and location to the necessary tools and techniques. So, let’s dive in and discover how to take your car audio system to the next level!
How to wire a center channel speaker in a car:
- Identify the positive and negative terminals on both the speaker and the car stereo.
- Connect the positive terminal of the speaker to the positive terminal of the car stereo using a speaker wire.
- Connect the negative terminal of the speaker to the negative terminal of the car stereo using another speaker wire.
- Ensure all connections are secure and properly insulated.
- Test the speaker to ensure it is functioning correctly.

How to Wire a Center Channel Speaker in a Car:
In a car audio system, the center channel speaker plays a crucial role in providing clear and balanced sound. It enhances the dialogue and vocals, making it an essential component for an immersive audio experience. Wiring a center channel speaker in a car might seem like a daunting task, but with the right steps and guidance, it can be easily accomplished. This article will guide you through the process of wiring a center channel speaker in your car, ensuring optimal performance and audio quality.
Step 1: Gather the Necessary Tools and Materials
Before you begin wiring your center channel speaker, it is essential to gather all the necessary tools and materials. This will ensure a smooth and efficient installation process. Here are the items you will need:
- Center channel speaker
- Car audio amplifier
- Wiring harness
- Wire strippers
- Electrical tape
- Wire crimpers
- Screwdriver set
- Multimeter
Make sure you have all these tools and materials readily available before proceeding to the next step.
Step 2: Locate a Suitable Mounting Position
The next step is to find a suitable mounting position for your center channel speaker. It should be placed in a central location to ensure optimal sound distribution. Look for an area on your car’s dashboard or console where the speaker can be securely mounted without obstructing any other components. Once you have identified the mounting position, proceed to the next step.
Step 3: Disconnect the Car Battery
Before you start any electrical work in your car, it is crucial to disconnect the car battery to prevent any potential accidents or damage. Locate the car battery and use a wrench to loosen the negative terminal. Once the negative terminal is disconnected, wrap it with electrical tape to ensure it doesn’t accidentally come into contact with the battery post.
Step 4: Connect the Wiring Harness
Now it’s time to connect the wiring harness to the center channel speaker. The wiring harness provides the necessary connections between the speaker and the car audio system. First, identify the positive and negative wires on the wiring harness and match them with the corresponding terminals on the speaker. Use wire strippers to remove a small section of insulation from each wire, and then use wire crimpers to attach the wires securely to the speaker terminals.
Once the wiring harness is connected to the speaker, route the wires through the car’s interior to the location of the car’s audio amplifier. Make sure to keep the wires away from any moving parts or hot surfaces to prevent damage.
Step 5: Connect the Speaker to the Amplifier
Now it’s time to connect the center channel speaker to the car audio amplifier. Locate the amplifier and identify the speaker output terminals. Match the positive and negative wires from the wiring harness to the corresponding terminals on the amplifier. Use wire crimpers to secure the connections, ensuring a tight and reliable fit.
Once the connections are made, it’s a good idea to use a multimeter to test the voltage and ensure everything is properly connected. Set the multimeter to the appropriate voltage setting and touch the positive and negative terminals of the speaker wires. If the reading on the multimeter matches the specifications provided by the amplifier manufacturer, you can proceed to the next step.
Step 6: Reconnect the Car Battery
With the wiring and connections complete, it’s time to reconnect the car battery. Remove the electrical tape from the negative terminal and securely tighten it using a wrench. Double-check all the connections and ensure everything is properly secured.
Once the car battery is reconnected, turn on your car audio system and test the center channel speaker. Play a variety of audio tracks to ensure the speaker is functioning correctly and providing clear and balanced sound.
Step 7: Fine-tune the Sound
After wiring the center channel speaker, you may need to fine-tune the sound settings to achieve the desired audio quality. Use the equalizer and audio controls on your car audio system to adjust the center channel speaker’s volume and balance. Experiment with different settings to find the optimal configuration that suits your preferences.
Remember to periodically check the wiring and connections to ensure they remain secure and free from any damage or wear. This will help maintain the performance and longevity of your center channel speaker in the car.
Faqs for How To Wire A Center Channel Speaker Car:
Answer:
To wire a center channel speaker in a car, you will need to follow a few steps. First, identify the positive and negative terminals on the speaker. These are usually marked with a “+” and “-” symbol. Next, locate the corresponding positive and negative wires in your car’s wiring harness. These wires are typically color-coded, with the positive wire being red or orange, and the negative wire being black or brown.
Once you have identified the wires, you will need to strip a small portion of insulation from the ends of the wires. This can be done using a wire stripper or a sharp knife. After stripping the wires, twist the exposed strands to ensure a secure connection.
Now, connect the positive wire from the speaker to the positive wire in the car’s wiring harness. You can do this by twisting the wires together and securing them with electrical tape or wire connectors. Repeat the same process for the negative wires. Finally, test the speaker to ensure it is working properly by playing audio through it.
Answer:
Yes, you can use the existing speaker wire in your car to connect the center channel speaker. In most cases, the car’s wiring harness already has wires for the front left, front right, and rear speakers. You can tap into these wires to connect the center channel speaker.
To do this, locate the wires for the front left and right speakers in the car’s wiring harness. These wires are usually color-coded, with the positive wire being red or orange, and the negative wire being black or brown. Strip a small portion of insulation from the ends of these wires and connect them to the corresponding positive and negative terminals on the center channel speaker.
It is important to note that using the existing speaker wire may cause a slight loss in audio quality, especially if the wire is not of high quality. If you are looking for the best audio performance, it is recommended to use separate, high-quality speaker wire for the center channel speaker.
Answer:
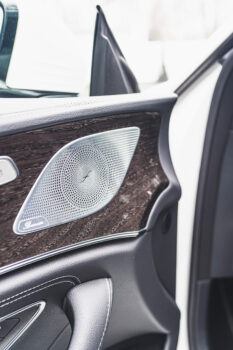
The purpose of a center channel speaker in a car audio system is to enhance the sound imaging and provide a more immersive listening experience. Unlike the front left and right speakers, which are typically located in the doors or dashboard, the center channel speaker is usually placed on the center of the dashboard, near the windshield.
The center channel speaker is responsible for reproducing the dialogue and vocals in movies, music, and other audio content. It helps to create a balanced soundstage by anchoring the vocals and sound effects to the center of the car. This improves the clarity and intelligibility of the audio, especially for the front passengers.
In addition, the center channel speaker also helps to distribute sound evenly across the front soundstage, ensuring that all occupants in the car can enjoy a consistent listening experience. It complements the front left and right speakers and is an essential component for achieving a high-quality car audio system.
Answer:
Yes, you can install a center channel speaker in a car without an aftermarket head unit. However, it may require some additional wiring and modifications.
If your car’s factory head unit does not have a dedicated center channel output, you can use a line output converter (LOC) to tap into the existing speaker wires and create a separate center channel signal. The LOC converts the high-level speaker output from the head unit into a low-level RCA signal that can be connected to the center channel speaker amplifier.
Once you have installed the LOC and connected it to the center channel amplifier, you can then wire the center channel speaker as mentioned earlier. It is important to follow the specific instructions provided with the LOC and consult a professional if you are unsure about the installation process.
Answer:
Proper phase alignment is crucial for achieving optimal sound quality when wiring a center channel speaker in a car. To ensure proper phase alignment, follow these steps:
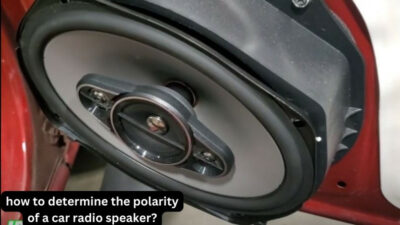
1. Start by determining the correct polarity of the speaker wires. The positive wire should be connected to the positive terminal on both the speaker and the amplifier, while the negative wire should be connected to the negative terminal.
2. If you are using an aftermarket head unit or amplifier with adjustable phase settings, make sure the phase is set to 0 degrees or normal. This ensures that the sound waves from the center channel speaker are in sync with the other speakers in the car.
3. Position the center channel speaker properly in the car. It should be mounted on the dashboard, facing the front passengers. Ensure that it is centered and aligned with the front left and right speakers for a balanced soundstage.
4. Finally, test the speaker by playing audio with a mix of vocals and sound effects. Listen for any phase cancellation or distortion. If you notice any issues, double-check the wiring connections and adjust the phase settings if necessary.
By following these steps, you can ensure proper phase alignment and achieve the best possible sound quality from your center channel speaker in a car audio system.

Source: pexels.com
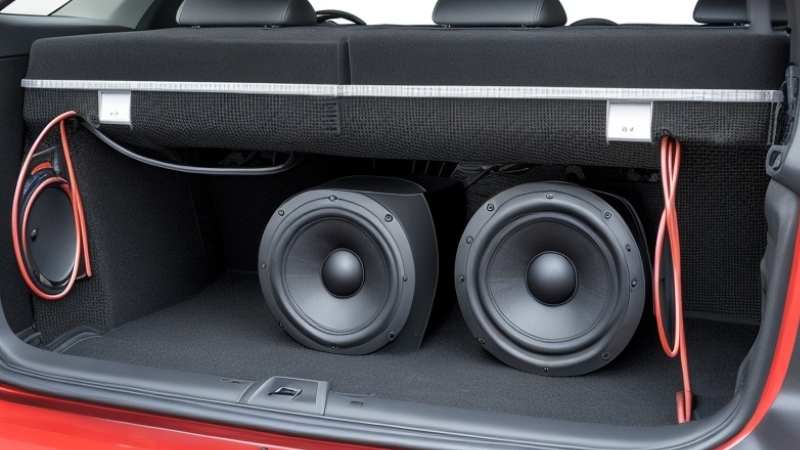
DIY Center Channel Speaker + 2 Way Crossover Series Wiring
conclusion:
learning how to wire a center channel speaker in your car is an essential skill for any audio enthusiast. By following the step-by-step instructions provided in this guide, you can successfully connect your center channel speaker and enhance your in-car audio experience. Remember to prioritize safety by disconnecting the car battery before starting any wiring work, and always double-check your connections to ensure they are secure and free from any potential hazards.
Mastering the art of wiring a center channel speaker not only allows you to enjoy crystal-clear sound while driving, but it also opens up a world of possibilities for customizing your car audio system. Whether you are a music lover, a movie buff, or simply someone who appreciates high-quality sound, the addition of a center channel speaker can greatly enhance your audio setup. So, why wait? Start exploring the world of car audio wiring today and take your in-car entertainment to the next level. With a little patience and attention to detail, you’ll be well on your way to achieving an immersive audio experience that will make your car rides truly unforgettable.