Effective Methods For Testing Car Battery Parasitic Drain
Do you often find yourself facing battery drainage issues with your car? Testing a car battery for a parasitic drain is crucial in diagnosing the problem. But how exactly can you do that? Well, you’re in the right place! In this article, we’ll guide you through the process of testing a car battery for a parasitic drain, providing you with an effective solution. So, let’s dive in and explore the steps you can take to identify and resolve battery drain issues. How to test a car battery for a parasitic drain? Let’s find out together!

How to Test a Car Battery for a Parasitic Drain?
Section 1: Introduction to Car Battery Parasitic Drain
A car battery parasitic drain refers to the slow discharge of the battery even when the engine is not running. This drain can occur due to various electrical components in your vehicle, such as the clock, radio memory, or even a faulty wiring connection. Testing your car battery for a parasitic drain is essential to prevent unexpected breakdowns and ensure your battery’s longevity. In this article, we will guide you through the process of testing your car battery for a parasitic drain, helping you diagnose and address any underlying issues.
Section 2: Signs of a Parasitic Drain
Before diving into the testing process, it’s important to recognize the signs that indicate a parasitic drain. These signs can include:
- The battery constantly needing jump-starts
- The battery losing charge even after being fully charged
- Electrical components malfunctioning or not working
- A clicking sound when turning the key in the ignition
- The battery warning light illuminating on the dashboard
If you experience any of these symptoms, it’s crucial to diagnose and address the issue promptly to avoid further battery damage or inconvenience.
Section 3: Preparing for the Test
To test your car battery for a parasitic drain, you’ll need the following tools:
- A digital multimeter
- A wrench or socket set
- A vehicle manual or wiring diagram
- Gloves and safety glasses for protection
Make sure your vehicle is parked in a safe location and turned off before starting the test. It’s also recommended to disconnect any aftermarket devices or accessories connected to the battery to ensure accurate results.
Section 4: Understanding the Multimeter
The multimeter is a versatile tool that measures electrical properties. Familiarizing yourself with its different functions is essential for the battery drain test. Here’s a brief overview of the multimeter settings:
- DC Voltage: Used to measure the battery’s voltage.
- Resistance (Ohms): Helps detect the presence of a parasitic drain.
- Ampere (A or mA): Measures the current flow in a circuit.
Understanding how to use these functions correctly is vital for conducting an accurate test.
Section 5: Testing for a Parasitic Drain
Follow these steps to test your car battery for a parasitic drain:
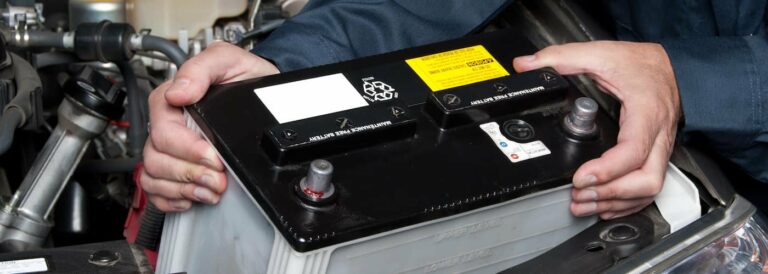
Step 1: Disconnect the Negative Battery Cable
Use the appropriate wrench or socket to loosen the nut on the negative battery terminal. Once loosened, gently remove the cable from the terminal, ensuring it doesn’t come into contact with any metal surfaces.
Step 2: Setting the Multimeter
Set your multimeter to the DC Voltage (V) mode. It’s recommended to use a range of 20 volts or higher to measure the battery’s voltage accurately.
Step 3: Connect the Multimeter
Connect the multimeter’s positive (red) probe to the positive battery terminal and the negative (black) probe to the negative battery terminal. Ensure a secure connection for accurate readings.
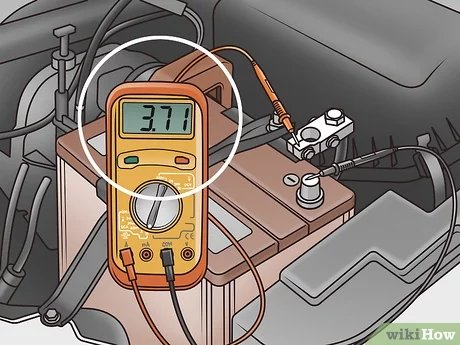
Step 4: Monitoring the Voltage
Observe the multimeter display to check the battery’s voltage. A healthy battery typically reads around 12.6 volts. If the voltage is significantly lower, it may indicate an existing drain.
Step 5: Testing for Drain
Reposition the multimeter’s negative (black) probe and connect it to the vehicle’s negative battery cable end previously disconnected. Be cautious not to let the probe touch any metal surfaces. Set the multimeter to the Resistance (Ohms) mode and observe the reading.
Step 6: Identifying the Drain
A normal reading in this test should be close to zero. If the multimeter displays high resistance, it indicates the presence of a parasitic drain in the vehicle’s electrical system.
Step 7: Isolating the Circuit
To identify the specific circuit causing the drain, you’ll need to remove and reinstall each fuse while monitoring the multimeter’s reading. When the reading drops, you’ve found the circuit responsible for the drain.
Step 8: Rectifying the Issue
Once you’ve identified the circuit, refer to your vehicle manual or wiring diagram to determine the components connected to it. Inspect the wiring, connectors, and components for any faults or signs of damage. Repair or replace any defective parts as necessary.
Step 9: Repeating the Test
After rectifying the issue, repeat the battery drain test to ensure the problem has been resolved. If the multimeter shows minimal or no drain, you’ve successfully addressed the parasitic drain.
Step 10: Reconnecting the Battery
Reattach the negative battery cable to the battery’s negative terminal, ensuring a tight connection. Double-check all connections before closing the hood.
Section 6: Seeking Professional Help
If you encountered difficulties during the testing process or failed to identify the circuit causing the parasitic drain, it’s recommended to seek professional assistance. Auto technicians have advanced diagnostic tools and expertise to accurately diagnose and fix complex electrical issues.
Section 7: Preventive Measures
To minimize the likelihood of experiencing a parasitic drain, consider the following preventive measures:
- Regularly inspect and clean battery terminals and connections
- Ensure all lights, including interior lights, are turned off when exiting the vehicle
- Avoid using aftermarket accessories that may draw excessive power
- Disconnect the battery or use a battery maintainer if the vehicle will remain parked for an extended period
- Regularly start and drive the vehicle to keep the battery charged
Implementing these measures can help extend your battery’s life and reduce the chances of a parasitic drain.
Car Battery Drains Overnight Or After Days Of No Use! PARASITIC DRAIN
Frequently Asked Questions
How do I test a car battery for a parasitic drain?
To test a car battery for a parasitic drain, follow these steps:
What tools are needed to test a car battery for a parasitic drain?
You will need a digital multimeter, jumper wires, and a wrench or socket set to disconnect the battery.
How do I prepare the vehicle for the battery drain test?
Before testing, make sure all electrical accessories are turned off, including lights, radio, and HVAC. Close all doors and ensure the key is removed from the ignition.
What is the procedure for measuring the battery drain?
First, disconnect the negative battery cable. Set your multimeter to the milliamp (mA) setting and connect it between the negative battery post and the disconnected cable. Wait for about 15 minutes to allow the vehicle modules to power down, then note the current reading on the multimeter.
What is an acceptable parasitic drain current?
An acceptable parasitic drain current should typically be less than 50 milliamps (mA). If it exceeds this limit, further investigation is required.
How do I identify the source of the parasitic drain?
To find the source of the drain, you can use the process of elimination. Remove and reinstall each fuse one by one while monitoring the multimeter reading. When the drain significantly decreases, you have found the circuit responsible for the parasitic drain.
What should I do if I cannot identify the source of the parasitic drain?
If you are unable to pinpoint the exact source of the parasitic drain, it is recommended to seek professional assistance from a qualified mechanic or automotive technician. They have the expertise and diagnostic tools to identify and fix the issue.
Final Thoughts
To test a car battery for a parasitic drain, follow these steps. First, ensure all electrical components are turned off and the car is parked in a safe location. Next, disconnect the negative battery cable and connect a multimeter between the negative battery terminal and the disconnected cable. Keep an eye on the multimeter reading for any abnormal voltage drop. Additionally, you can use an ammeter to measure the amount of current flowing from the battery. By performing these tests, you can identify and address any parasitic drain affecting your car battery’s performance. How to test a car battery for a parasitic drain is a crucial step in maintaining optimal battery health and avoiding unexpected breakdowns.