How To Replace A Car Battery Cable: Easy Steps!
If you’re facing issues with your car battery, one of the potential culprits could be a faulty battery cable. But fret not! Replacing a car battery cable is easier than you might think. In this article, we will walk you through the step-by-step process of how to replace a car battery cable, ensuring a smooth and hassle-free experience. So, let’s dive right in and get your car back on the road in no time!

How To Replace A Car Battery Cable:
Swapping out a car battery cable might seem daunting, but armed with the right tools and some know-how, you can tackle this task with confidence. Battery cables are vital in your car’s electrical system, facilitating the transfer of power from the battery to various components. Over time, these cables can corrode, become damaged, or wear out, leading to weak electrical connections and potential performance issues. This step-by-step guide will walk you through the process of replacing a car battery cable, ensuring a successful do-it-yourself endeavor.
Assessing the Battery Cable:
Before diving into the replacement process, it’s crucial to assess the condition of your battery cable. This section will guide you on how to identify common signs of cable damage and determine if a replacement is necessary.
Signs of Cable Damage:
- Corrosion: Check for green or white buildup around the cable ends or connectors.
- Frays or Breaks: Inspect the cable for any visible frays or breaks in the insulation or wires.
- Loose Connections: Wiggle the cable ends to ensure they are securely attached to the battery and the corresponding terminals.
- Melted or Burnt Insulation: If you notice any melted or burnt insulation around the cable, it’s a clear indication of damage.
- Poor Electrical Performance: If you’re experiencing electrical issues, such as dim headlights or difficulty starting the car, the cable might be the culprit.
1.2 Assessing the Cable
Once you’ve identified potential signs of damage, it’s time to assess the overall condition of the cable. Follow these steps:
- Open the hood of your car and locate the battery.
- Visually inspect the cables, looking for any visible damage, corrosion, or loose connections.
- Check both ends of the cable, including the battery terminals and the points where the cable connects to the starter or ground.
- Ensure the cable is not excessively worn, bent, or kinked.
If you observe any significant damage or signs of wear, it’s recommended to proceed with replacing the car battery cable to prevent potential electrical issues and ensure optimal performance.
Gathering the Necessary Tools and Materials
Before starting the replacement process, gather the tools and materials you’ll need. Having everything prepared in advance will save you time and effort. Here’s a comprehensive list of what you’ll require:
2.1 Tools
- Safety goggles and gloves
- Adjustable wrench or socket set
- Battery terminal cleaner or wire brush
- Wire cutters/strippers
- Heat shrink tubing or electrical tape
- Heat gun or lighter (if using heat shrink tubing)
2.2 Materials
- New car battery cables
- Anti-corrosion spray or grease
Ensure that you have all the necessary tools and materials on hand before starting the replacement process to avoid unnecessary delays.
Safety Precautions
Before replacing the car battery cable, it’s crucial to prioritize safety. This section will outline some essential safety precautions to follow throughout the process.
3.1 Safety Tips
- Always wear safety goggles and gloves to protect your eyes and hands from any potential hazards.
- Ensure the vehicle’s engine is turned off and the key is removed from the ignition.
- Disconnect the negative (-) terminal of the battery first, followed by the positive (+) terminal.
- Avoid smoking or sparking near the battery to minimize the risk of fire or explosion.
- Keep any open flames or flammable materials away from the battery.
By adhering to these safety precautions, you can confidently proceed with replacing your car battery cable while minimizing the potential risks.
Removing the Old Battery Cable
Now that you’ve assessed the cable, gathered the necessary tools, and ensured your safety, it’s time to remove the old battery cable. This section will guide you through the process step-by-step.
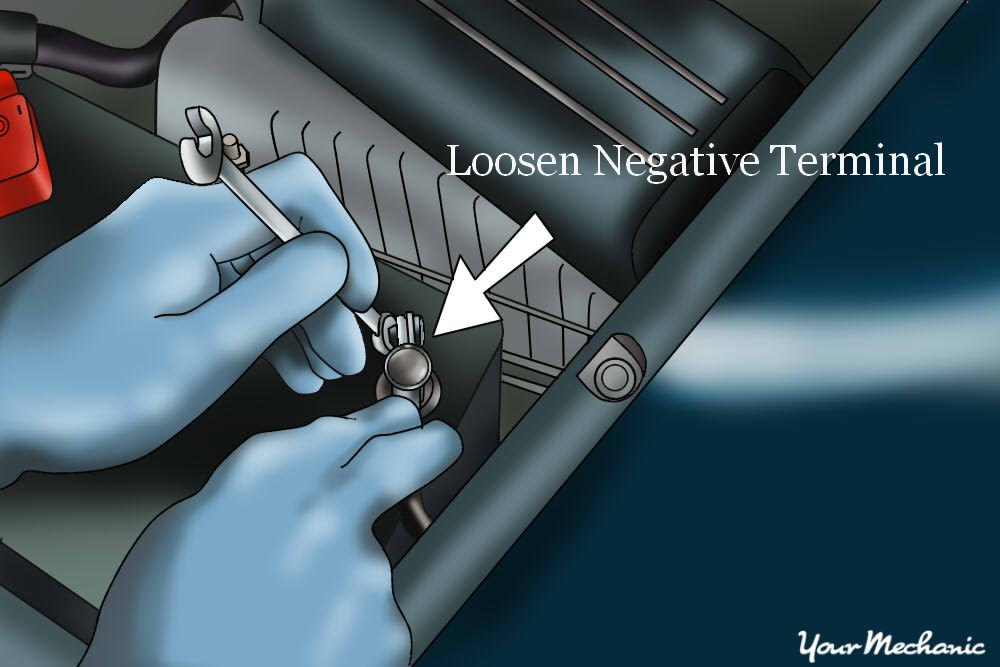
4.1 Removing the Negative Cable
Follow these steps to remove the negative battery cable:
- Using an adjustable wrench or socket set, loosen the nut connecting the negative cable to the battery’s negative terminal.
- Once the nut is loose, carefully lift the cable end off the terminal.
- Ensure the cable end is secured away from the battery terminal to prevent accidental contact.
- Inspect the cable for any additional connections to the vehicle’s body or engine block. If present, remove those connections as well.
4.2 Removing the Positive Cable
To remove the positive battery cable, follow these steps:
- Using the adjustable wrench or socket set, loosen the nut connecting the positive cable to the battery’s positive terminal.
- Once the nut is loose, carefully lift the cable end off the terminal.
- Ensure the cable end is secured away from the battery terminal and any other metal components.
- Inspect the cable for any additional connections and remove them if necessary.
Removing the old battery cable sets the stage for the installation of the new cable, ensuring a clean and efficient replacement process.
Section 5: Installing the New Battery Cable
With the old battery cable successfully removed, it’s time to install the new one. This section will guide you through the process of installing the new battery cable.
5.1 Connecting the Positive Cable
Follow these steps to connect the positive battery cable:
- Take the new positive battery cable and ensure it is the appropriate length and gauge for your vehicle.
- Position the cable end over the positive terminal of the battery.
- Slide the cable end onto the terminal and ensure it is seated firmly.
- Tighten the nut securely using an adjustable wrench or socket set.
- If any additional connections were present on the old cable, reconnect them to the appropriate locations.
5.2 Connecting the Negative Cable
To connect the negative battery cable, follow these steps:
- Take the new negative battery cable and ensure it is the correct length and gauge.
- Position the cable end over the negative terminal of the battery.
- Slide the cable end onto the terminal and ensure a secure fit.
- Tighten the nut securely using an adjustable wrench or socket set.
- If any additional connections were present on the old cable, reconnect them as needed.
By following these steps, you can successfully install the new battery cable, ensuring a solid and reliable electrical connection.
Section 6: Securing and Testing the New Cable
After installing the new battery cable, it’s important to secure it properly and test its functionality. This section will guide you through securing the new cable and conducting a testing process.
6.1 Securing the Cable
Follow these steps to secure the new battery cable in place:
- Ensure all connections are tight and secure, minimizing any potential movement or vibration.
- Apply a small amount of anti-corrosion spray or grease to the battery terminals and cable ends.
6.2 Testing the New Cable
To test the functionality of the new battery cable, follow these steps:
- Reconnect the negative (-) battery terminal.
- Reconnect the positive (+) battery terminal.
- Start the vehicle’s engine and verify that all electrical components are functioning correctly.
- If any issues persist, double-check the cable connections and ensure they are securely in place.
By securing the cable properly and conducting a thorough testing process, you can ensure the successful replacement of your car’s battery cable.
Section 7: Proactive Maintenance Tips
To prolong the lifespan of your newly replaced car battery cable, it’s essential to follow regular maintenance practices. This section will provide you with some proactive maintenance tips to keep your cables in optimal condition.
7.1 Regular Cleaning
- Periodically inspect your battery cables for any signs of corrosion or buildup.
- Use a wire brush or battery terminal cleaner to remove any corrosion or debris.
- Ensure the cable ends and terminals are clean and free from any contaminants.
7.2 Protective Coating
- Apply a thin layer of petroleum jelly or anti-corrosion spray to the cable ends and battery terminals.
- This protective coating will help prevent future corrosion and maintain optimal electrical connections.
7.3 Regular Inspection
- Periodically check the cable connections for any signs of looseness or wear.
- If you notice any issues, promptly tighten or replace the cable as needed.
Following these proactive maintenance tips will ensure the longevity and reliability of your car battery cables, minimizing the need for frequent replacements.
In conclusion, replacing a car battery cable is a manageable task that can be accomplished with the right tools and knowledge. By carefully assessing the condition of your cable, following safety precautions, and using the step-by-step process outlined in this guide, you can successfully replace your car battery cable and restore optimal electrical performance to your vehicle. Remember to prioritize safety, gather the necessary tools and materials, and conduct regular maintenance to ensure the longevity of your newly installed cable. Now you’re equipped with the knowledge to confidently tackle the replacement of a car battery cable on your own. Happy DIY-ing!
How to Change your Car Battery Terminal Connectors
Frequently Asked Questions
How do I replace a car battery cable?
To replace a car battery cable, follow these steps:
1. Begin by turning off the engine and ensuring all electrical devices are turned off.
2. Locate the battery cable that needs to be replaced. It is usually connected to the positive or negative terminal of the battery.
3. Using a wrench or socket set, loosen and remove the cable’s terminal connection to the battery.
4. Trace the cable to its other end and disconnect it from any other components it may be attached to, such as the starter or ground point.
5. Install the new battery cable by connecting it to the appropriate terminals and components, ensuring a snug fit.
6. Tighten all connections securely but avoid over-tightening to prevent damage.
7. Finally, double-check all connections, ensuring they are properly seated and free from any corrosion or debris.
It is recommended to consult the vehicle’s manual or seek professional assistance if unsure about the process.
What tools do I need to replace a car battery cable?
To replace a car battery cable, you will need the following tools:
– Wrench or socket set (appropriate size for terminal connections)
– Pliers or wire cutters (if the cable needs to be trimmed or shaped)
– Battery terminal cleaner or wire brush (to remove corrosion)
– Safety gloves and goggles (to protect against any potential hazards)
Can I replace a car battery cable myself or should I seek professional help?
Replacing a car battery cable can be done by a knowledgeable car owner with the right tools and precautions. However, if you are unsure or unfamiliar with automotive electrical systems, it is recommended to seek professional help to ensure the job is done correctly and safely.
How often should car battery cables be replaced?
The lifespan of car battery cables can vary depending on various factors such as the quality of the cables, driving conditions, and maintenance. However, it is generally recommended to inspect the battery cables regularly for signs of wear, damage, or corrosion. If any issues are detected, they should be addressed promptly to prevent potential electrical problems. In case of severe damage or extensive corrosion, it may be necessary to replace the car battery cables.
What are the signs that indicate a car battery cable needs replacement?
Several signs indicate that a car battery cable may need replacement. These include:
– Difficulty starting the engine or intermittent loss of power
– Dimming headlights or electrical malfunctions
– Corrosion on the battery terminals or cable ends
– Visible damage to the cable insulation or loose connections
If you experience any of these issues, it is advisable to inspect the battery cables and consider replacing them if necessary.
Are there any precautions to take while replacing a car battery cable?
When replacing a car battery cable, it is important to take the following precautions:
– Ensure the engine and all electrical devices are turned off before starting the replacement process.
– Wear safety gloves and goggles to protect against any potential hazards.
– Disconnect the negative battery cable first to prevent accidental electrical contact.
– Avoid touching any metal surfaces or components while the battery is connected.
– Double-check all connections after installation to ensure they are secure and properly seated.
– Dispose of the old battery cable properly according to local regulations.
Following these precautions will help ensure a safe and successful replacement process.
Final Thoughts
Replacing a car battery cable is a relatively simple task that can be accomplished by following a few steps. Firstly, ensure the car is turned off and the battery is disconnected. Then, locate the faulty cable and remove it using appropriate tools. Next, attach the new cable, ensuring a secure connection. Finally, reconnect the battery and test the car to ensure the cable replacement was successful. By following these steps, anyone can replace a car battery cable with ease. So, if you’re faced with a faulty car battery cable, don’t hesitate to take action and get it replaced promptly.