Charging A Car Battery With A Battery Tender
Did you know that you can easily charge a car battery using a battery tender? It’s a simple and efficient solution to keep your battery charged and ready to go. Whether you’ve left your car idle for too long or you just want to give your battery a boost, a battery tender is the perfect tool. In this article, we will guide you through the process of charging a car battery using a battery tender. So, let’s get started with the step-by-step instructions on how to charge a car battery using a battery tender.

How to Charge a Car Battery Using a Battery Tender?
Introduction
Charging a car battery is an essential part of vehicle maintenance, especially if you don’t drive your car regularly. A battery tender is a device designed to trickle charge a battery and keep it at optimal levels. In this guide, we will explore the process of charging a car battery using a battery tender, including step-by-step instructions, safety precautions, and common troubleshooting tips.
Why Use a Battery Tender?
Benefits of Using a Battery Tender
Using a battery tender offers several advantages over traditional battery chargers. Here are some key benefits:
1. Maintains Battery Health: Battery tenders provide a low, continuous charge that prevents the battery from sulfating or losing its charge over time.
2. Longer Battery Life: By regularly charging your battery with a tender, you can extend its lifespan and avoid premature replacement.
3. Safe and Convenient: Battery tenders are designed to be left connected to the battery for extended periods without risk of overcharging or damage.
Choosing the Right Battery Tender
Before charging your car battery with a battery tender, it’s important to select the right device for your needs. Consider the following factors when choosing a battery tender:
1. Compatibility: Ensure that the battery tender is compatible with your specific battery type (e.g., lead-acid, AGM, gel, or lithium-ion).
2. Capacity: Check the tender’s charging capacity to ensure it meets the requirements of your car battery.
3. Features: Look for additional features such as automatic shut-off, multi-stage charging, and float mode that can enhance the charging process and protect your battery.
Step-by-Step Guide to Charging a Car Battery Using a Battery Tender
1. Prepare for Charging
Before connecting the battery tender, take the following preparatory steps:
– Park your car in a well-ventilated area away from open flames or sources of ignition.
– Ensure that the battery terminals are clean and free of corrosion.
– Familiarize yourself with the battery tender’s user manual for specific instructions and safety precautions.
2. Connect the Battery Tender
Follow these steps to connect the battery tender to your car battery:
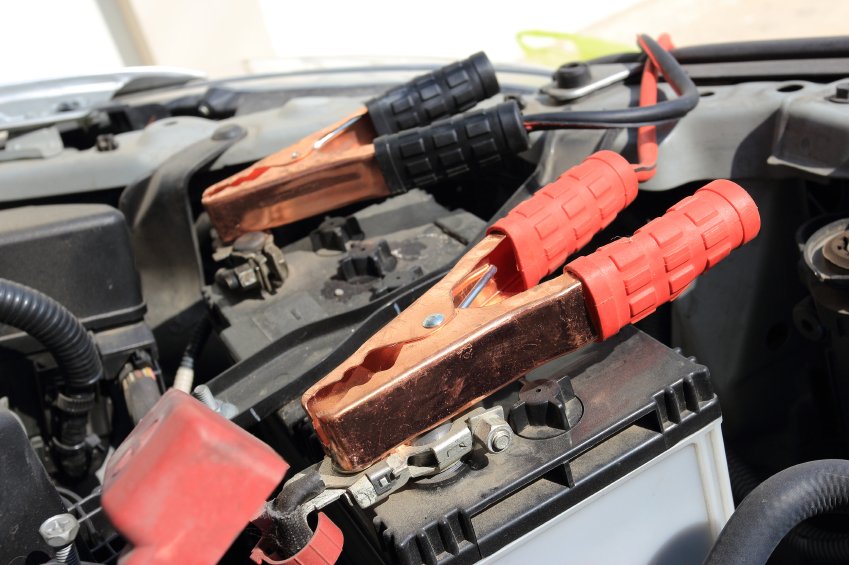
– Identify the positive (+) and negative (-) terminals on your car battery. The positive terminal is usually red, while the negative terminal is black.
– Discharge any accessories or devices connected to the battery.
– Attach the red (positive) clamp of the battery tender to the positive terminal of the battery.
– Connect the black (negative) clamp of the battery tender to either a metal part of the car chassis or the negative terminal of the battery.
– Ensure that the clamps are securely attached and free from any metal objects or obstructions.
3. Set the Charging Parameters
Depending on the battery tender model, you may need to adjust some charging parameters:
– Select the appropriate charging mode for your battery type. Consult the user manual for guidance.
– Set the desired charging voltage or amperage if applicable.
– Activate any additional features like float mode or maintenance mode as needed.
4. Start the Charging Process
Once you have connected and set up the battery tender, it’s time to initiate the charging process:
– Plug the battery tender into a standard electrical outlet.
– Turn on the battery tender using the power switch or button.
– Observe the charging indicators on the battery tender. They may vary depending on the model but typically include LED lights or a display panel.
– Monitor the charging process periodically to ensure proper functioning and address any issues promptly.
5. Disconnect and Store the Battery Tender
When the battery is fully charged or you are finished charging, follow these steps to disconnect and store the battery tender:
– Turn off the battery tender and unplug it from the electrical outlet.
– Remove the negative (black) clamp from the battery terminal or chassis.
– Detach the positive (red) clamp from the battery terminal.
– Inspect and clean the battery terminals if necessary.
– Store the battery tender in a dry, cool place, away from direct sunlight or extreme temperatures.
Safety Precautions
1. Ventilation
Always charge your car battery in a well-ventilated area to prevent the accumulation of potentially explosive gases.
2. Safety Gear
Wear protective eyewear and gloves to safeguard yourself from any potential hazards during the battery charging process.
3. Avoid Sparks
Ensure that all accessories are turned off and the battery terminals are securely connected to avoid sparks or electrical hazards.
4. Read the Manual
Carefully read and follow the instructions provided by the battery tender manufacturer to avoid any accidents or damage.
Troubleshooting Tips
1. Battery Not Charging
If your battery is not charging, here are some troubleshooting steps to consider:
– Double-check all connections and ensure they are secure.
– Verify that the battery tender is receiving power from the outlet.
– Inspect the battery for signs of damage or corrosion.
– Check if the battery tender’s charging mode is appropriate for your battery type.
2. Battery Tender Not Working
If your battery tender is not functioning properly, try the following:
– Confirm that the battery tender is compatible with your battery type.
– Check the power source and ensure it is delivering adequate voltage.
– Inspect the battery tender for any visible damage or loose connections.
– Contact the manufacturer’s customer support for further assistance.
3. Battery Tender Overheating
If you notice your battery tender overheating, take the following measures:
– Turn off the battery tender and disconnect it from the power source.
– Allow the unit to cool down before attempting to use it again.
– Check for any obstructions or objects that may be limiting airflow around the battery tender.
Conclusion
Charging your car battery using a battery tender is a simple and effective way to maintain battery health and prolong its lifespan. By following the step-by-step guide and adhering to safety precautions, you can ensure a successful charging process. Remember to choose the right battery tender, set the appropriate charging parameters, and monitor the charging process. Regularly charging your car battery using a battery tender will ensure that your vehicle is always ready to hit the road when needed.
Battery Tender® 4 AMP Battery Charger and Maintainer
Frequently Asked Questions
How do I charge a car battery using a battery tender?
To charge a car battery using a battery tender, follow these steps:
Can I connect the battery tender directly to the car battery?
Yes, you can connect the battery tender directly to the car battery. Simply connect the positive (red) terminal of the battery tender to the positive terminal of the car battery, and the negative (black) terminal of the battery tender to the negative terminal of the car battery.
Do I need to disconnect the car battery before using a battery tender?
It is not necessary to disconnect the car battery before using a battery tender. However, if you prefer to disconnect it, make sure to follow the correct order: disconnect the negative (black) terminal first, then the positive (red) terminal.
How long does it take to charge a car battery using a battery tender?
The charging time for a car battery using a battery tender can vary depending on the battery’s current state of charge. On average, it can take around 12 to 24 hours to fully charge a car battery.
Can I leave the battery tender connected to the car battery for an extended period of time?
Yes, you can leave the battery tender connected to the car battery for an extended period of time. Battery tenders are designed to automatically switch to a maintenance or float mode once the battery is fully charged, preventing overcharging.
Is it safe to charge a car battery using a battery tender indoors?
Yes, it is generally safe to charge a car battery using a battery tender indoors. Battery tenders are designed to be safe for indoor use, but it’s always a good idea to read the manufacturer’s instructions and follow any recommended safety precautions.
Can I use a battery tender to charge other types of batteries?
While battery tenders are primarily designed for charging car batteries, they can also be used to charge other types of batteries, such as motorcycle batteries, lawnmower batteries, or marine batteries. Just make sure to check the manufacturer’s instructions for compatibility and proper usage.
Final Thoughts
In conclusion, charging a car battery using a battery tender is a simple and efficient process. By following the steps outlined in this article, you can ensure the longevity and optimal performance of your car battery. Remember to connect the battery tender correctly, set the appropriate charging settings, and monitor the charging progress. By utilizing a battery tender, you can maintain the health of your car battery and avoid potential issues down the road. So, next time you need to charge your car battery, consider using a battery tender for a hassle-free experience. How to charge a car battery using a battery tender?