Efficiently Test Car Battery With A Load Tester
Have you ever thought about the condition of your car battery? If you’re looking to learn how to check a car battery using a load tester, you’re in the right spot. This straightforward yet reliable approach will allow you to assess your battery’s condition and prevent any unexpected issues while driving. Let’s explore how to test a car battery with a load tester!

How to Test a Car Battery with a Load Tester?
Testing a car battery regularly is crucial to ensure its reliability and prevent unexpected breakdowns. One effective way to test a car battery is by using a load tester. A load tester applies a controlled load to the battery and measures its ability to maintain voltage under that load. This comprehensive guide will walk you through the step-by-step process of testing a car battery with a load tester to help you identify any issues and ensure optimal battery performance.
1. Understanding Load Testing
Before diving into the testing process, it’s essential to understand what load testing is and why it’s important. Load testing evaluates the battery’s ability to deliver a consistent and reliable amount of electrical power to start the car’s engine. By applying a known load and monitoring the battery’s response, you can determine if it is capable of meeting the vehicle’s power demands or if it needs to be replaced.
Why Do You Need to Load Test a Car Battery?
Load testing provides several crucial benefits, including:
1. Early Detection of Battery Issues: Load testing helps identify battery problems before they lead to unexpected breakdowns, ensuring a reliable vehicle.
2. Preventive Maintenance: Regular load testing enables you to perform maintenance and replace the battery if necessary, saving you from potential hardships on the road.
3. Cost Savings: By identifying a faulty battery early on, you can avoid expensive repairs, such as tow services and roadside assistance.
4. Peace of Mind: Knowing that your battery is in good condition instills confidence and reduces the likelihood of being stranded due to a dead battery.
2. Gathering the Required Tools and Materials
Before conducting a load test, gather the following tools and materials:
1. Load Tester: Invest in a reliable load tester capable of delivering precise and accurate readings.
2. Safety Equipment: For your protection, wear safety goggles and gloves to prevent injury during the testing process.
3. Voltmeter: A digital voltmeter is necessary to measure the battery’s voltage accurately.
4. Battery Cleaning Supplies: Ensure you have a wire brush, baking soda, and water to clean the battery terminals if necessary.
3. Preparing for the Load Test
Proper preparation is crucial to obtain accurate test results. Follow these steps before conducting the load test:
3.1. Safety First
Always prioritize safety when dealing with a car battery:
1. Park the Vehicle: Park your vehicle in a well-ventilated area away from open flames or sparks.
2. Turn Off the Engine: Ensure the engine is off, and all electrical accessories are turned off, including headlights, radio, and air conditioning.
3. Wear Safety Gear: Put on safety goggles and gloves to protect yourself from any potential acid splashes or electrical shock.
3.2. Inspect the Battery
Carefully examine the battery for any signs of damage or leaks. If you notice any cracks, corrosion, or acid leaks, it is advisable to replace the battery before performing the load test.
3.3. Clean the Battery Terminals
If you observe corrosion or build-up on the battery terminals, follow these steps to clean them:
1. Prepare a Mixture: Mix baking soda and water to create a solution.
2. Disconnect Battery Cables: Disconnect the negative (black) cable first, followed by the positive (red) cable.
3. Clean the Terminals: Use a wire brush to scrub the terminals gently. Dip the brush in the baking soda solution to remove any corrosion effectively.
4. Rinse and Dry: After cleaning, rinse the terminals with clean water and let them dry before reconnecting the cables.
4. Load Testing Process
Now that the battery and the testing environment are prepared, let’s move on to the load testing process:
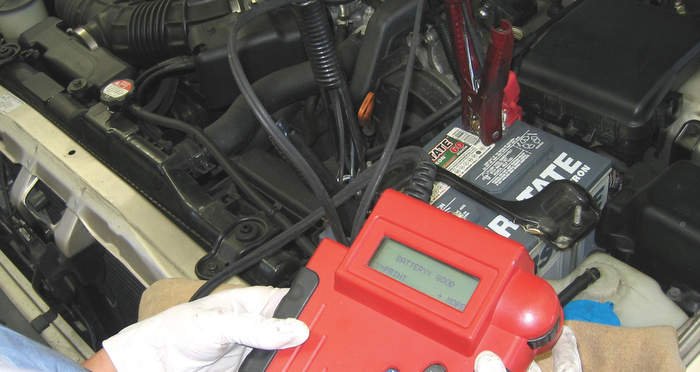
4.1. Connect the Load Tester
Follow these steps to connect the load tester to the battery:
1. Positive Connection: Attach the load tester’s positive (red) lead to the positive terminal of the battery.
2. Negative Connection: Connect the load tester’s negative (black) lead to the negative terminal of the battery.
4.2. Adjust Load Tester Settings
After connecting the load tester, it’s time to adjust the settings according to the instructions provided by the manufacturer. This includes selecting the appropriate load and load duration on the load tester.
4.3. Activate the Load Test
Once the load tester is configured, follow the manufacturer’s instructions to initiate the load test. Typically, this involves pressing a button or flipping a switch to activate the load.
4.4. Monitor Voltage Drop
As the load tester applies a controlled load to the battery, monitor the voltage drop indicated on the load tester’s display. Note the readings carefully during the duration of the load test.
5. Interpreting the Results
Analyzing the load test results is vital to determine the battery’s health. Here’s how to interpret the findings:
5.1. Stable Voltage Drop
If the voltage drop remains stable and within an acceptable range throughout the load test, it indicates that the battery is in good condition. The battery should be able to provide sufficient power to start the engine reliably.
5.2. Rapid Voltage Drop
A rapidly declining voltage during the load test suggests that the battery might be weak or nearing the end of its life. Consider replacing the battery to avoid unexpected failures or breakdowns.
5.3. Voltage Drop Below Acceptable Range
If the voltage drops below the acceptable range specified by the load tester or the manufacturer, it indicates a weak battery that requires immediate replacement.
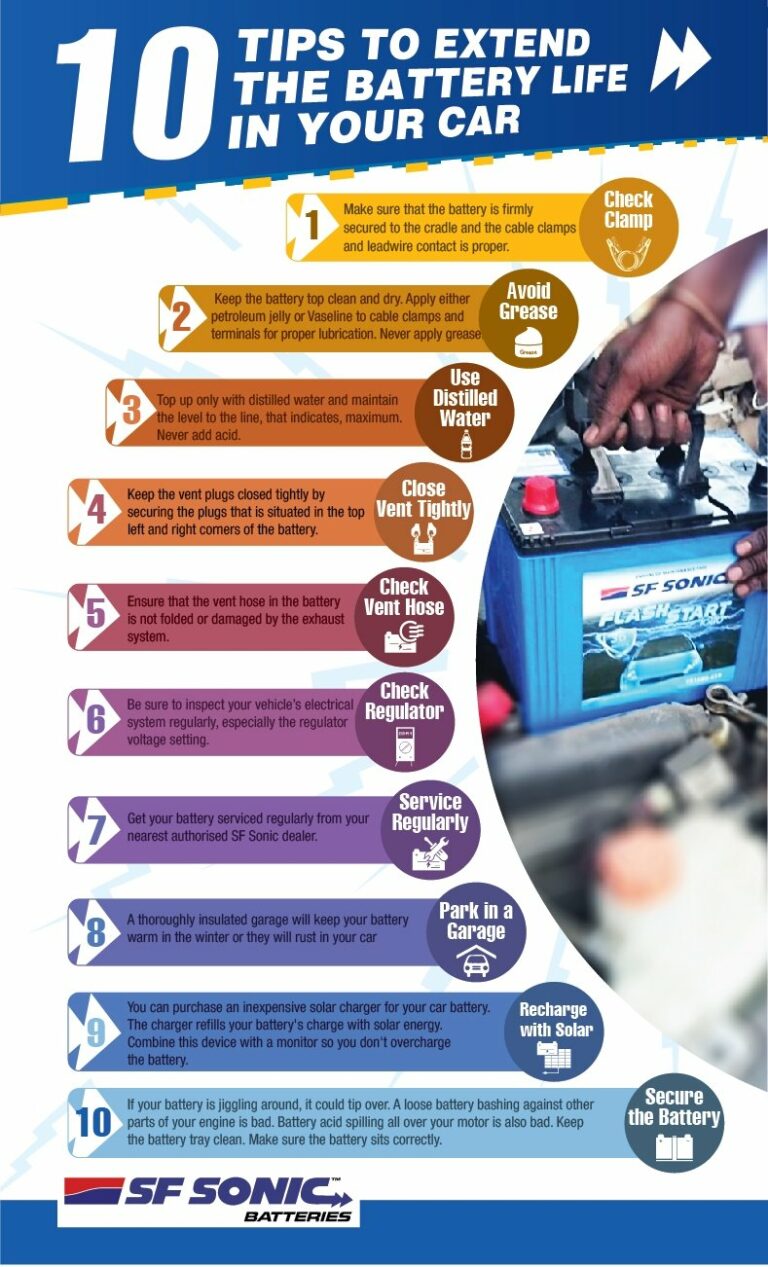
6. Maintaining a Healthy Car Battery
After conducting the load test, you can take the following measures to maintain a healthy car battery:
1. Regularly Inspect the Battery: Check the battery for corrosion, leaks, or other damage. Clean the terminals as needed.
2. Drive Your Vehicle Regularly: Avoid long periods of inactivity, as this can lead to battery discharge. Regular driving keeps the battery charged.
3. Limit Electrical Accessory Usage: Minimize using electrical accessories when the engine is off to avoid draining the battery unnecessarily.
4. Avoid Extreme Temperatures: Park your vehicle in shaded areas during hot summers and use a battery insulation wrap in cold winters to prevent temperature-related battery issues.
Conclusion
Regularly testing your car battery’s performance using a load tester is a crucial step in ensuring the reliability and longevity of your vehicle. By following the step-by-step process outlined in this guide, you can identify weak batteries before they fail and take proactive measures to avoid unexpected breakdowns. Remember, proper maintenance and attention to your car battery will provide peace of mind and keep you on the road without any battery-related hassles.
Load Testing A Battery – EricTheCarGuy
Frequently Asked Questions
How do I test a car battery with a load tester?
To test a car battery with a load tester, follow these steps:
1. Start by ensuring the car’s engine is turned off and all electrical components are off.
2. Connect the load tester’s positive (red) clamp to the battery’s positive terminal.
3. Connect the load tester’s negative (black) clamp to the battery’s negative terminal.
4. Turn on the load tester and apply a load of about half the battery’s Cold Cranking Amps (CCA) for 15 seconds.
5. Observe the load tester’s voltage reading; if it drops significantly below 9.6 volts, it indicates a weak or faulty battery.
6. If the voltage remains stable, gradually increase the load until the reading drops below 9.6 volts, which indicates the battery’s maximum capacity.
7. Once you have completed the test, disconnect the load tester from the battery terminals.
Remember to always consult your load tester’s manual for specific instructions and safety precautions.
What is a load tester?
A load tester is a specialized tool used to evaluate the performance and capacity of a car battery. It operates by applying a controlled electrical load to the battery and measuring its voltage response. By simulating real-world conditions, load testers can determine if a battery is able to deliver the required power to start the vehicle reliably.
Why should I test my car battery with a load tester?
Testing your car battery with a load tester helps ensure its reliability and performance. By applying a load and monitoring the voltage response, you can accurately assess the battery’s ability to deliver the necessary power for starting your vehicle. This allows you to identify weak or faulty batteries before they fail, helping prevent unexpected breakdowns and unnecessary replacements.
When should I test my car battery with a load tester?
It is recommended to test your car battery with a load tester regularly, especially before long trips or during extreme weather conditions. Additionally, if you notice any signs of a weak battery, such as slow cranking, dim lights, or difficulty starting the vehicle, it is advisable to perform a load test to determine the battery’s condition accurately.
Can I use a multimeter instead of a load tester to test my car battery?
While a multimeter can provide some basic information about your car battery’s voltage, it cannot provide a comprehensive evaluation of its performance and capacity like a load tester. A load tester applies a controlled load to the battery and measures the voltage response under realistic conditions, giving a more accurate assessment of the battery’s overall health.
What are the possible outcomes of a load test on a car battery?
During a load test on a car battery, there are three possible outcomes:
1. If the voltage drops significantly below 9.6 volts immediately after applying the load, it indicates a weak or faulty battery that needs replacement.
2. If the voltage remains stable, the battery is considered healthy and capable of delivering the required power.
3. If the voltage drops below 9.6 volts only when applying a load close to the battery’s CCA rating, it indicates reduced capacity but may still function adequately in less demanding conditions.
Final Thoughts
In conclusion, testing a car battery with a load tester is a crucial step in determining its condition and performance. By following the simple steps outlined in this article on ‘How to test a car battery with a load tester?’, car owners can ensure their battery is in optimal health and avoid unexpected breakdowns on the road. Regularly assessing the battery’s capacity and voltage under load will provide valuable insights into its overall functionality and help maintain a reliable vehicle. Remember to prioritize safety precautions and consult professional assistance if needed.